
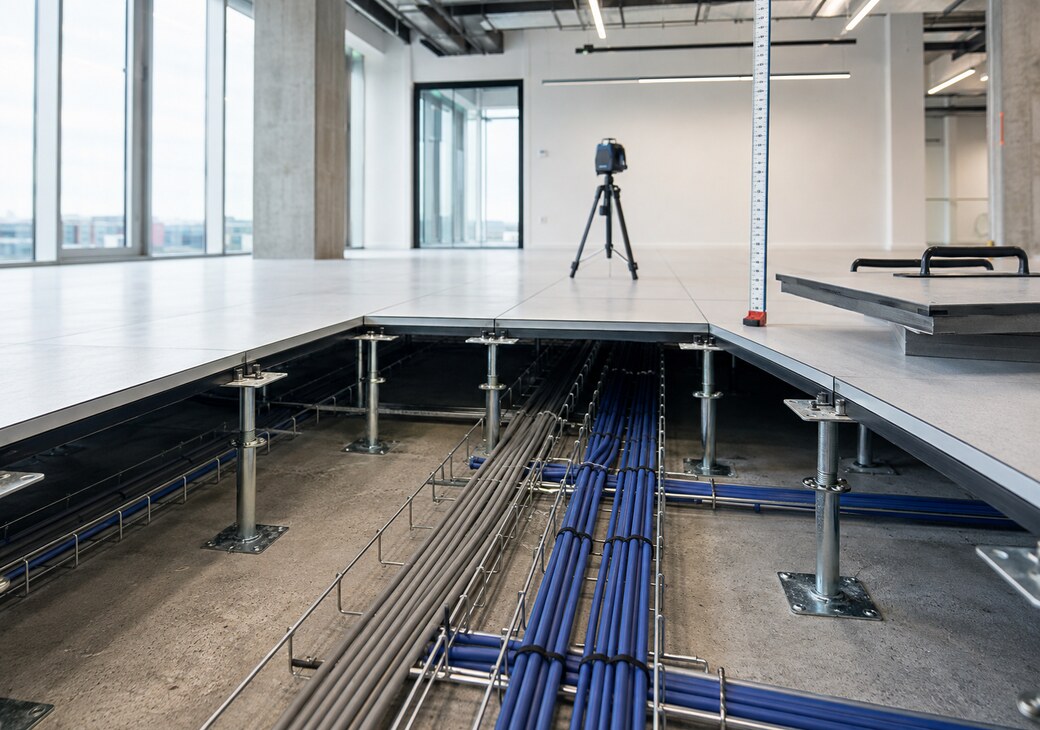
There is no single correct height for every raised access floor. The finished floor level must provide enough clear space for cables, trays, floor boxes and maintenance while using a pedestal that remains within its approved adjustment range. Start with the services and surrounding floor levels, then work backwards to calculate the required pedestal height.
Raised-floor height: the quick answer
A raised access floor should be high enough to contain the required services without crushing cables, blocking access or preventing floor boxes from fitting, but no higher than the project requires. Unnecessary height increases the transition into the room and may introduce different support or stability requirements.
For a straightforward commercial office, the design may only need a modest service void for power and data cables. A floor containing deep floor boxes, larger cable trays, ventilation equipment or complex services will need more clearance. Data-centre and specialist technical floors require project-specific design rather than a generic height copied from an office installation.
The safest sequence is:
- Survey the structural slab and record the required finished floor level.
- Identify the deepest service, tray, junction or floor box beneath the panels.
- Add the access and separation space required by the service design.
- Confirm the panel thickness and any finish applied above it.
- Select a pedestal whose approved adjustment range contains the calculated setting.
Finished floor level, clear void and pedestal height explained
Confusion usually starts because several different measurements are described simply as “floor height”. They must be separated before a pedestal is selected.
| Term | What it means | Why it matters |
|---|---|---|
| Finished floor level (FFL) | The level of the usable top surface, measured from the structural slab or another agreed datum. | It controls thresholds, door clearances, ramps and alignment with adjoining floors. |
| Panel build-up | The access-floor panel thickness plus any bonded or loose-laid finish that contributes to the final level. | It must be deducted when working back from the target FFL. |
| Pedestal height | The installed support height between the slab and panel support point, measured in accordance with the selected system. | It determines which adjustable pedestal range is suitable. |
| Clear void | The usable space from the slab to the underside of the panel, after allowing for understructure and obstructions. | This is the space available for cables, trays, floor boxes, airflow and access. |
How do you calculate the required pedestal height?
Once the required finished floor level is known, calculate the support height by subtracting every layer that sits above the pedestal support point. For a typical bare access panel, this starts with the panel thickness. If a permanently bonded finish contributes to the build-up, include that as well.
For example, if the agreed finished floor level is 150mm above the slab and the selected panel build-up is 31mm, the nominal support setting is approximately 119mm. That figure is a selection starting point, not permission to ignore slab variation, product tolerances or the manufacturer's installation method.
Survey several slab points rather than measuring in one convenient corner. The pedestal range needs enough adjustment to achieve the same finished level across the highest and lowest relevant areas of the slab.
Our Raised Floor Calculator V2 lets you enter finished floor level and panel thickness, then recommends an appropriate pedestal range while calculating the required system quantities.
What controls the required raised-floor height?
1. Power, data and containment
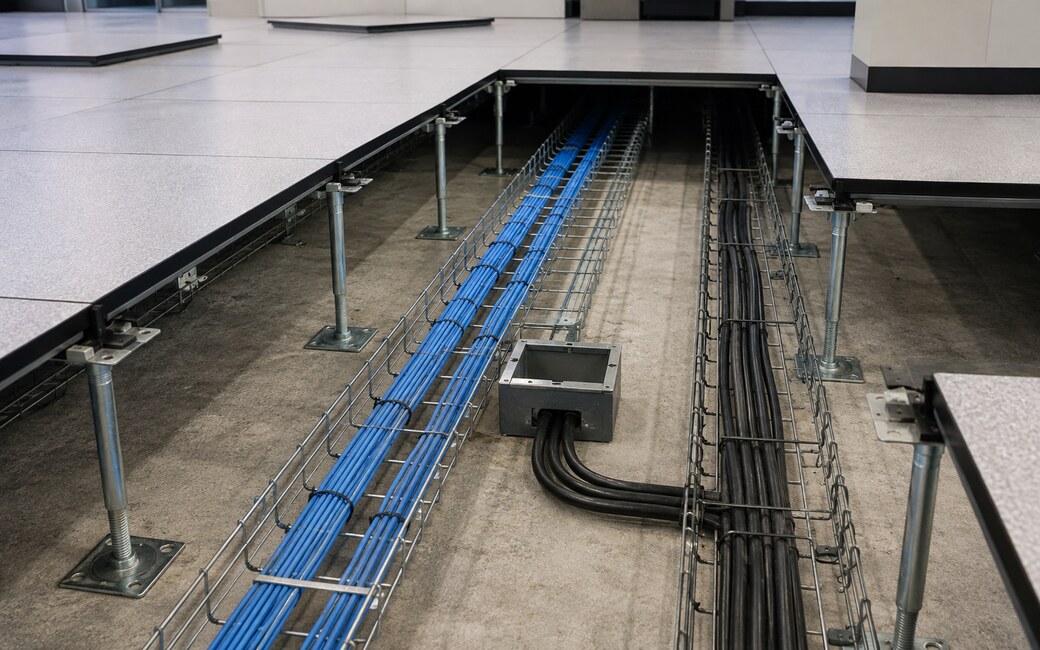
Cables need more than enough space to physically pass beneath the panel. The design should accommodate bends, cable trays, separation requirements, crossings and future access without forcing services hard against the underside of the floor.
2. Floor-box depth
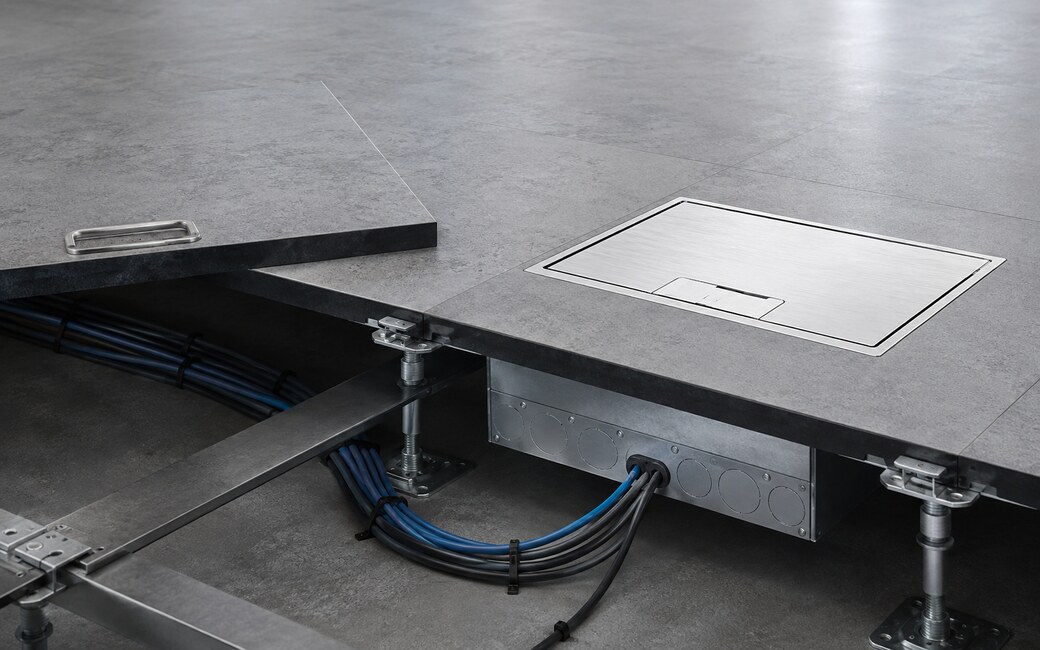
A recessed floor box may extend significantly below the panel. The complete box body, cable entry and permitted bend radius must fit without contacting the slab or obstructing other services.
3. Maintenance and future changes
A technically possible but cramped void can be difficult to maintain. If panels will be lifted regularly to add or reroute services, allow workable access rather than designing around a perfectly packed initial layout.
4. Air distribution
Where the floor void forms part of a ventilation or cooling strategy, height cannot be selected from cable requirements alone. Airflow, pressure, leakage, obstructions and grille positions must be designed by the appropriate project specialist. See our dedicated guide to raised access flooring for data centres for the wider data-centre considerations.
5. Existing building constraints
Door leaves, skirting, stairs, glazing, accessible routes, ceiling height and neighbouring floor levels may limit the available build-up. These interfaces are often more restrictive than the pedestal itself.
Practical height-planning bands
The following bands are early planning guidance, not universal specifications. The final height must be checked against the selected panel, pedestal and complete system documentation.
| Project condition | Planning approach | Checks before selection |
|---|---|---|
| Low-profile cable management | Keep the build-up as low as practical while preserving the required cable routes and panel support. | Minimum pedestal setting, plug and bend clearance, slab flatness and perimeter details. |
| General commercial office | Allow for separated power/data routes, floor boxes and reasonable maintenance access. | Floor-box depth, containment crossings, furniture layout, thresholds and future capacity. |
| Larger service void | Use the space required by the coordinated services design rather than choosing a height from habit. | Pedestal stability, stringers, bracing, ramps, interfaces and tested system limitations. |
| Data centre or specialist technical area | Treat the floor as part of the equipment, loading, cooling and cable-management design. | Engineer/specifier requirements, airflow strategy, point loads, system testing and operational access. |
Once the required build-up is known, browse the available raised access-floor pedestals or use a complete raised-floor system kit to keep panels and understructure compatible.
How much clearance is needed for floor boxes and cables?
Do not select a floor height from the faceplate dimensions of a floor box. Measure the body below the panel, the cable-entry position, connectors and the space needed to route cables without excessive bending or compression.
The deepest part of the box is only the starting point. A usable design must also account for:
- cable glands, plugs and connectors below the box;
- the manufacturer's minimum cable bend radius;
- containment passing beneath or beside the box;
- safe separation of relevant services;
- clearance needed to install, inspect and replace components;
- local slab variation and other fixed obstructions.
Review the intended floor boxes and power units before fixing the final floor level. For cable-only penetrations, the cable-grommet range may provide a more appropriate panel detail than a full recessed box.
Do taller raised floors need stringers?
Height is one factor in deciding whether an understructure needs stringers, but it is not the only factor. The panel system, lateral stability, equipment loads, rolling loads and project specification all matter.
Stringers connect pedestal heads and can add lateral restraint and edge support within systems designed to use them. However, they must not be added casually to a stringerless system or omitted from a tested stringered configuration.
Use the access-floor stringers specified for the selected understructure, and confirm compatibility with the panel, pedestal head and fixing arrangement. For performance terminology and load classifications, read our guide to raised access-flooring standards.
Plan doorways, ramps and finished-floor transitions early
Every millimetre added to the raised floor must be resolved where it meets a lower surface. A doorway into an unraised corridor may need a properly designed ramp or another transition detail. A doorway into a floor at the same final level may need no change in height but still requires coordinated trims and edge support.
Before choosing the finished floor level, check:
- door-leaf and frame clearances;
- accessible route and ramp requirements;
- landings and available ramp length;
- stairs, skirting, glazing and low-level services;
- edge support and cut-panel details;
- the thickness of carpet tiles, vinyl or other final finishes.
Accessibility and means-of-escape details are project matters. Have the proposed transition checked by the responsible designer or other competent person rather than selecting a ramp solely from the floor height.
Common raised-floor height mistakes
Ordering from finished height alone
A 150mm finished floor does not automatically require a 150mm pedestal. The panel build-up sits above the pedestal support point and must be deducted.
Measuring only one point on the slab
A pedestal that works in one corner may run outside its adjustment range elsewhere. Survey high and low points across the footprint.
Allowing for cables but not their containment
Cable baskets, crossings, connectors and floor boxes often require more height than the cables themselves.
Choosing the lowest possible void
A very shallow floor may appear economical but become difficult to install, inspect or modify. Minimum physical fit is not the same as workable access.
Using extra height without resolving transitions
A taller void affects doorways, ramps, headroom and adjoining finishes. These consequences need to be designed before the floor is ordered.
Mixing components from unverified systems
Panels, pedestals, heads, caps, stringers and fixings must form a compatible system. Start with the required performance and build-up, then select tested components rather than assembling a system from dimensions alone.
What information should you confirm before ordering?
- Room length, width and any irregular areas.
- Structural slab level at multiple survey points.
- Target finished floor level.
- Panel type, thickness and final surface finish.
- Largest service, containment crossing and floor-box depth.
- Required access and future service capacity.
- Doorways, perimeter edges, ramps and adjoining levels.
- Loading, stability and applicable project specification.
- Pedestal adjustment range across the complete slab.
- Compatibility of panels, pedestals, caps, stringers and fixings.
When those details are available, use the raised-floor calculator to estimate panels, pedestals and related components. For the fitting sequence after specification, use the separate raised access-floor installation guide.
Frequently asked questions
What is the minimum height for a raised access floor?
There is no universal minimum suitable for every project. The minimum usable height is controlled by the selected system's permitted adjustment range, slab condition, panel build-up and the deepest service or connection beneath the panel. A low-profile system should only be selected after confirming that cables, floor boxes and maintenance access will fit.
Does panel thickness count towards raised-floor height?
Yes. If the target finished floor level is measured from the structural slab to the usable top surface, the panel thickness—and any finish contributing to that surface—forms part of the total build-up. Deduct that build-up when calculating the nominal pedestal setting.
What is the difference between finished floor height and void height?
Finished floor height is measured to the final walking surface. Clear void is the usable space below the panel. The void is smaller because the access-floor panel and parts of the supporting system occupy some of the overall build-up.
How do I choose the correct adjustable pedestal?
Calculate the required support setting from the target finished level and panel build-up, then compare it with the manufacturer's approved adjustment range. Allow for slab high and low points so every pedestal remains within its permitted range across the room.
How much space should I leave for floor boxes?
Allow for the full depth of the box body plus connectors, cable entries, bend radius, containment and installation access. Use the dimensions and installation requirements of the exact floor box rather than relying on the visible faceplate size.
Do high raised floors always need stringers?
Not solely because of height, but taller floors may require additional lateral stability. Stringer requirements depend on the complete tested system, loads, pedestal design and project specification. Follow the manufacturer or responsible designer's requirements.
Can I increase the floor height later?
Minor adjustment may be possible if the existing pedestals remain within their approved range, but a significant increase can affect stability, perimeter details, ramps, doors, services and component suitability. Treat a major height change as a system redesign rather than a simple adjustment.
Calculate your raised-floor system
Enter the room dimensions, finished floor level and panel thickness to estimate the required panels, pedestals and associated components.
Use the raised-floor calculator