
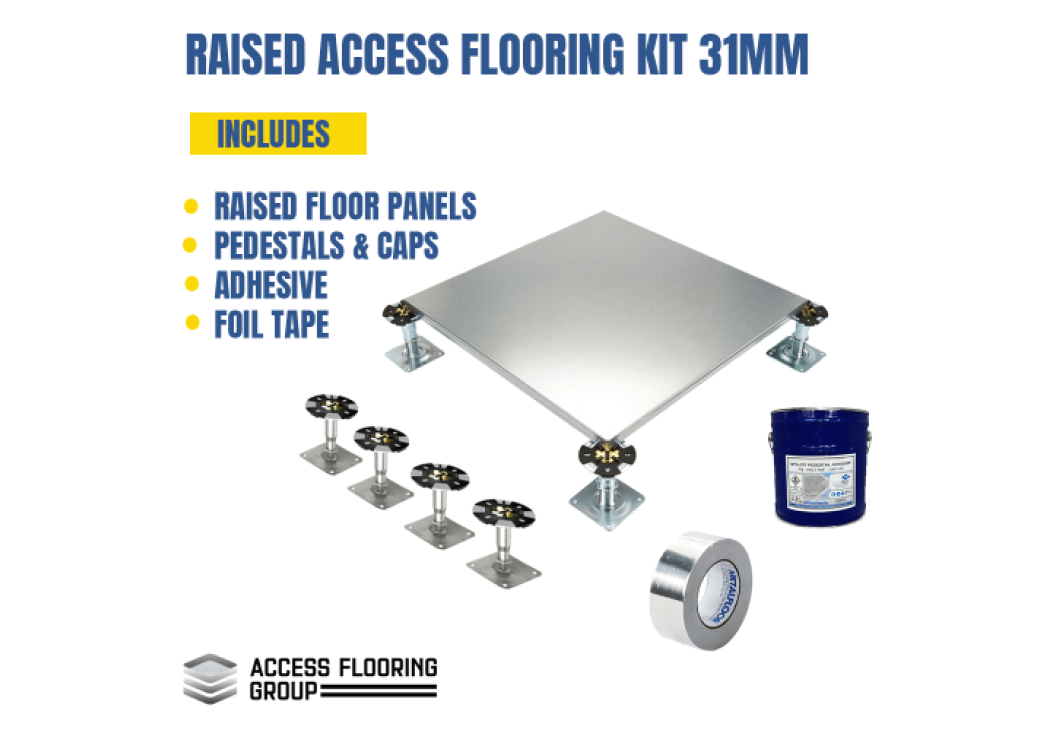
Installing a raised access floor involves more than placing adjustable pedestals beneath panels. The subfloor, finished floor height, grid position, pedestal fixing method, panel layout, perimeter support and services must all follow the project design and the selected manufacturer’s installation requirements.
What is a raised access flooring system?
A raised access floor is a modular floor constructed above a structural subfloor. Panels are supported by adjustable pedestals, creating an accessible void beneath the finished floor.
The void may be used for:
- power and data cabling;
- cable trays and containment;
- floor boxes and service outlets;
- underfloor air distribution where specifically designed; and
- services that require future inspection or alteration.
Raised floors are commonly used in offices, server rooms, control rooms, communications facilities and commercial refurbishment projects.
Browse our raised access flooring systems to understand the principal components used in a complete system.
Before installation begins
Review the approved drawings, system specification and current manufacturer instructions before materials are installed. Do not combine panels, pedestals, stringers, caps or fixings from different systems unless compatibility has been expressly confirmed.
Confirm the following:
- room dimensions and structural grid;
- finished floor level and required clear void;
- panel size, thickness and layout;
- pedestal type and adjustment range;
- whether stringers are required;
- design loads and equipment positions;
- service penetrations and floor-box locations;
- ramps, steps, door thresholds and adjoining floor levels;
- perimeter support details; and
- specified adhesives, fixings and curing conditions.
Step 1: Inspect and prepare the subfloor
The structural subfloor should be suitable for the loads transferred through the pedestal bases. It should also be sufficiently sound, clean and dry for the specified fixing method.
Before setting out:
- Remove loose material, dust, oil and construction debris.
- Survey the slab for high points, depressions, cracks and significant level variation.
- Confirm that moisture conditions comply with the adhesive and system requirements.
- Identify movement joints and confirm how they are treated in the raised-floor design.
- Mark areas containing concealed services where drilling or mechanical fixing is restricted.
- Apply a subfloor sealer only where required by the specification or adhesive manufacturer.
Pedestals should not be bonded over contamination, loose surface material or an unsuitable coating. Any uncertainty over the slab should be resolved before installation continues.
Step 2: Establish the finished floor height
Establish the project datum and transfer the required finished floor level around the room using a calibrated laser level or equivalent survey equipment.
Finished floor level, clear service void and pedestal height are related, but they are not the same measurement. Panel thickness and any bonded floor finish must be allowed for when calculating the pedestal setting.
Before selecting or adjusting the pedestals, follow our guide to calculating the correct raised access floor height. It explains how to work backwards from the required finished floor level and service void.
The calculated setting must remain within the approved adjustment range of the selected raised access floor pedestals. Do not extend or modify a pedestal beyond the manufacturer’s stated range.
Step 3: Set out the panel grid
Set out two accurate control lines at right angles. The starting position should be determined from the approved layout and the most important interfaces—not automatically from the geometric centre of the room.
Consider:
- doorways and thresholds;
- columns and structural walls;
- equipment and partition positions;
- floor boxes and service penetrations;
- ramps and steps; and
- the size of perimeter cut panels.
Check the room dimensions against the panel module, commonly 600 × 600mm. Adjust the starting line where necessary to avoid unnecessarily narrow or impractical perimeter cuts.
Mark the grid clearly enough to position the pedestal centres without accumulating errors across the room. Recheck diagonals and dimensions before fixing any large area of pedestals.
Step 4: Position and fix the pedestals
Position each pedestal on the marked grid so that its centre aligns with the intersection of the panel corners. The base must sit fully on the prepared subfloor.
Depending on the system and project specification, pedestals may be installed using an approved pedestal adhesive, mechanical fixings or another tested method.
- Confirm that the pedestal type and adjustment range are correct.
- Prepare and apply the specified fixing product according to its current instructions.
- Position the pedestal accurately on the grid intersection.
- Set the approximate height from the established datum.
- Keep pedestal heads correctly aligned for the panel or stringer system.
- Observe the required curing conditions before loading the fixing.
Browse the available access-floor pedestal adhesives, but confirm that the selected product is approved for the subfloor, pedestal and site conditions.
Step 5: Fit stringers where required
Stringers connect adjacent pedestal heads and can help maintain the grid, provide lateral restraint or form part of a system designed for particular loads.
Not every loose-lay floor requires stringers. Conversely, some screw-down or higher-performance systems depend on a specified stringer configuration to achieve their declared classification.
Where stringers are required:
- Use the type specified for the complete system.
- Install them in the stated orientation.
- Clip or mechanically secure them as instructed.
- Check that the grid remains square.
- Do not omit screws or substitute fixings.
View our access-floor stringers for available configurations.
Step 6: Lay and level the access-floor panels
Begin laying full panels from the established control area. Follow the installation sequence specified for the system and avoid trapping the installer in an unsafe or inaccessible position.
- Check that pedestal heads, caps and stringers are correctly seated.
- Use suitable lifting equipment to place each panel without damaging its edges.
- Maintain the specified panel orientation where panels are directional.
- Check the panel joints, grid alignment and surface level continuously.
- Adjust pedestal height using the intended adjustment mechanism.
- Secure screw-down panels using the specified screws and tightening procedure.
Browse our range of raised access flooring panels.
Do not correct rocking panels by inserting improvised packing beneath the panel. Determine whether the cause is pedestal height, grid alignment, debris, damaged components or incorrect installation.
Step 7: Coordinate floor boxes and service penetrations
Mark penetrations from verified service drawings and check their relationship with pedestal positions, panel edges and equipment layouts before cutting.
Large openings and cut-outs can reduce panel strength. Additional support may be required around floor boxes, cable openings, grilles and other penetrations.
- Use the appropriate cutting tool and blade for the panel construction.
- Support the panel securely before cutting.
- Use extraction and suitable respiratory, eye and hearing protection.
- Protect finished surfaces from sparks and hot metal particles.
- Remove swarf and debris immediately.
- Treat exposed cut edges where the manufacturer requires it.
- Install suitable trim or a correctly sized cable grommet.
Suitable products can be found in our floor boxes and power units and cable grommets categories.
Step 8: Cut and support the perimeter panels
Measure perimeter panels individually where walls are uneven. Cut panels accurately and maintain the perimeter detail specified for the system.
Every cut panel should retain adequate support. Narrow cuts, doorways, corners, ramps and heavily loaded edges may require additional pedestals or purpose-designed perimeter support.
Do not assume that every installation requires the same expansion gap. The correct clearance and perimeter treatment depend on the panel construction, floor finish, room layout and manufacturer’s instructions.
Avoid forcing oversized panels into place. This can disturb the grid, damage panel edges or transfer unwanted pressure into adjoining panels.
Step 9: Complete the final inspection
Inspect the completed floor systematically before it is covered, loaded or handed over.
| Check | What to inspect |
|---|---|
| Level | Finished surface against the specified datum and adjoining floor levels |
| Panel fit | Consistent joints, correct seating and no unexplained rocking |
| Grid | Straight panel lines and correctly aligned pedestal heads |
| Fixings | Specified screws, stringers, adhesive and mechanical fixings installed correctly |
| Perimeters | Cut panels supported and edge details completed |
| Penetrations | Openings supported, protected and fitted with the specified trim or grommet |
| Void | Debris removed and services left accessible without obstructing required airflow |
Protect the completed floor from following trades. Heavy loads should not be introduced until the fixing products have cured and the floor has been approved for the intended loading.
Common raised-floor installation mistakes
- Starting without an approved layout: this can create narrow perimeter cuts and conflicts with equipment or floor boxes.
- Confusing pedestal height with finished floor height: panel thickness and finishes must also be included.
- Using an unsuitable adhesive: compatibility and site conditions must be checked.
- Loading pedestals before curing: this can disturb their position or weaken the fixing.
- Allowing grid errors to accumulate: small errors become significant across a large floor.
- Unsupported cut panels: perimeter pieces and penetrations may need additional support.
- Mixing system components: unverified combinations may not deliver the declared performance.
- Leaving debris in the void: this can interfere with services, airflow and future maintenance.
Why correct installation matters
The performance of a raised floor depends on the complete installed system. Poor setting-out, incorrect pedestal adjustment or inadequate edge support can lead to movement, uneven joints, rocking panels and avoidable remedial work.
A correctly specified and installed floor provides:
- a stable and level working surface;
- accessible routes for services;
- consistent panel alignment;
- properly supported perimeter details;
- safer access for maintenance; and
- performance aligned with the tested system configuration.
Review our guide to raised access flooring standards when assessing the required system performance.
Frequently asked questions
Do all raised-floor pedestals need to be glued down?
No single fixing method applies to every system. Pedestals may use an approved adhesive, mechanical fixing or another specified method. Follow the selected system’s current installation instructions and the project specification.
Do all raised access floors need stringers?
No. Some loose-lay systems do not require stringers, while certain screw-down or higher-performance systems use a specified stringer arrangement. Do not add or omit them without checking the tested system configuration.
Can raised access flooring panels be cut on site?
Many panels can be cut on site using suitable equipment, extraction and protective measures. Cut panels and large penetrations may require additional support, edge treatment or trim. Always follow the panel manufacturer’s instructions.
How do you level a raised access floor?
Establish the finished floor datum with calibrated surveying equipment and adjust the pedestals using their intended mechanism. Check level, grid alignment and panel stability continuously as installation progresses.
Can raised access flooring be installed as a DIY project?
Small, straightforward areas may appear simple, but errors can affect stability, loading and perimeter safety. Commercial, equipment-bearing or technically specified floors should be installed or supervised by competent personnel.
Plan your raised access floor
Calculate your approximate material quantities, then select a compatible panel, pedestal and fixing system for the required floor height and project conditions.
Use the raised access floor calculator